Published: October 26, 2023
Mastering the operation of a limestone Raymond mill is a straightforward process when built upon a foundation of understanding its core principles, systematic startup/shutdown procedures, routine maintenance, and troubleshooting. This training guide, drawing from Liming Heavy Industry's decades of engineering expertise, is designed to empower operators with the knowledge to run their Raymond mill efficiently, safely, and at peak performance for processing limestone and similar non-metallic minerals. By following these structured steps and best practices, you can ensure consistent product fineness, maximize equipment lifespan, and maintain a smooth production flow.
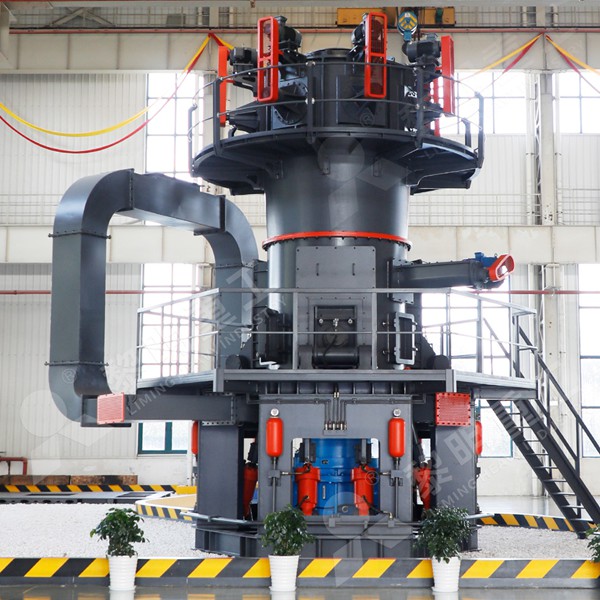
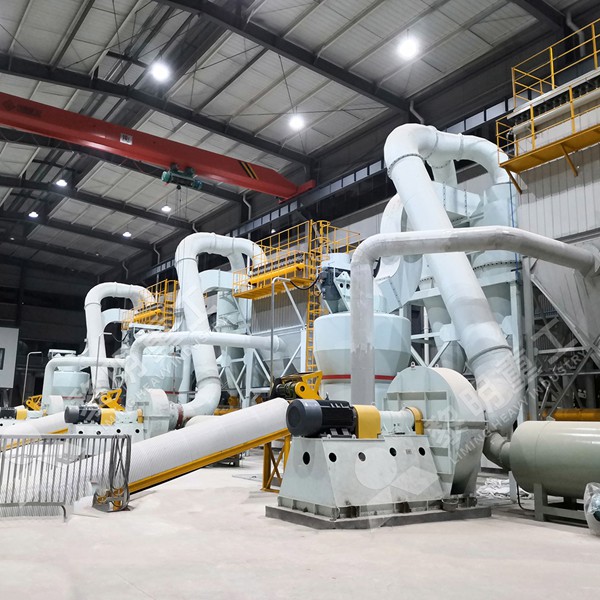
At its heart, the Raymond mill from Liming Heavy Industry is a robust grinding system engineered for materials like limestone with Mohs hardness under 7 and humidity below 6%. Its working principle is elegant in its efficiency: bulk limestone is first reduced by a jaw crusher, then evenly fed into the grinding chamber via a vibrating feeder. Inside, the material is ground between the stationary ring and rotating rollers. The ground powder is carried upward by the airflow to the classifier (separator), where oversized particles are rejected and returned for regrinding, while the qualified fine powder passes through and is collected as the final product. This closed-circuit air system, recirculated by an air blower and cleaned by a pulse dust collector, is key to its energy efficiency and environmental compliance.
Before initiating the startup sequence, a thorough pre-operation inspection is non-negotiable. This includes checking all access doors are securely closed, inspecting the grinding rollers and ring for wear or residual material, ensuring the lubricating oil levels in the reducer and bearings are adequate, verifying that all belt drives have proper tension, and confirming that the auxiliary equipment—like the jaw crusher, feeder, and dust collector—is clear and functional. Always prioritize safety: ensure all guards are in place and personnel are clear of moving parts.
The startup procedure must follow a strict sequence to prevent equipment damage. First, activate the pulse dust collection system. Next, start the main air blower. After the airflow is established, initiate the grinding mill's main motor. Once the mill is running smoothly, start the feeder and crusher system to begin introducing material. Critical Tip: Begin feeding at a lower rate than the rated capacity and gradually increase to the target load. This allows the system to stabilize thermally and mechanically, preventing choking and ensuring consistent fineness from the start.
During operation, the key to easy management is consistent monitoring. Regularly check the amperage of the main motor—a sudden increase may indicate overfeeding or a blockage, while a decrease could signal underfeeding. Monitor the temperature of the grinding chamber and bearing housings; abnormal rises warrant immediate investigation. Pay close attention to the sound of the grinding process; a steady, rhythmic noise indicates normal operation, whereas metallic impacts or irregular vibrations suggest issues. The product fineness is adjusted primarily by changing the speed of the classifier. Increasing the speed yields a finer product, while decreasing it produces a coarser powder. Make adjustments incrementally and allow the system time to stabilize between changes.
The shutdown sequence is the reverse of startup but with a crucial waiting period. First, stop the feeding system and allow the crusher and feeder to clear. Continue running the grinding mill for several minutes to process all remaining material inside the chamber—this prevents material from hardening and cementing on the rollers and ring during downtime. Then, stop the grinding mill main motor. After the mill has completely stopped rotating, shut down the main air blower. Finally, turn off the dust collection system. Always follow the manufacturer's lock-out/tag-out procedures before performing any internal inspection or maintenance.
Routine maintenance is the cornerstone of easy, trouble-free operation. Daily tasks include checking lubricant levels and listening for unusual noises. Weekly, inspect the wear parts like grinding rollers and the grinding ring, and check the tension of all drive belts. Lubricate bearings as per the manual's schedule. The pulse dust collector's filter bags should be inspected regularly for damage or clogging. A comprehensive inspection of the internal liners, shovel arms, and classifier blades should be conducted during scheduled shutdowns. Keeping a detailed log of all observations, adjustments, and maintenance activities is invaluable for predicting wear and planning parts inventory.
Even with the best care, issues may arise. Here are common scenarios: If the output fineness becomes inconsistent, check the classifier speed setting and the wear condition of the grinding elements. A sudden drop in production capacity often points to a worn shovel blade failing to lift material effectively or a blockage in the feeder. Excessive vibration typically indicates unbalanced wear on a grinding roller, a broken roller, or loose foundation bolts. Abnormal noise from the gearbox requires immediate shutdown to check lubrication and gear alignment. For any persistent electrical or mechanical fault, always consult the official Liming Heavy Industry manual and contact qualified technical support.
By internalizing this training material and combining it with hands-on experience under the guidance of seasoned operators, new personnel can quickly become proficient in managing the limestone Raymond mill. Liming Heavy Industry's design philosophy emphasizes reliability and user-friendliness, making the journey from novice to expert a smooth one. Remember, consistent operation, vigilant monitoring, and proactive maintenance are your most powerful tools for achieving optimal grinding performance year after year.
Frequently Asked Questions (FAQ)
- What is the most common cause of a drop in Raymond mill output capacity for limestone?
The most frequent cause is excessive wear on the shovel blades inside the grinding chamber. When these blades wear down, they cannot effectively scoop and lift the material into the space between the rollers and the grinding ring, leading to reduced throughput. Regular inspection and timely replacement of these wear parts are essential. - How often should we change the lubricating oil in the main reducer?
Refer strictly to the intervals specified in your specific model's operation manual. As a general guideline from Liming Heavy Industry, the initial oil change should occur after the first 500-700 hours of operation. Subsequent changes typically follow every 2500-4000 hours of operation, but this can vary based on operating conditions, oil type, and environmental factors. Always monitor oil quality regularly. - Can the Raymond mill grind materials with moisture content slightly above 6%?
It is not recommended. The standard Raymond mill design is for materials with humidity less than 6%. Higher moisture can cause the limestone powder to adhere inside the mill, clogging the grinding chamber, the classifier, and the piping. This leads to reduced efficiency, increased power consumption, and potential shutdowns. For damp materials, consider a system with integrated drying or consult Liming for a modified solution. - What does a loud, periodic knocking sound from the grinding chamber usually indicate?
A periodic knocking or banging sound often signals that one of the grinding rollers is either severely unevenly worn, has a flat spot, or may have a broken component. It can also be caused by a large, ungrindable foreign object that has entered the chamber. Immediate shutdown and internal inspection are required to identify and rectify the cause to prevent further damage. - How do we properly adjust the fineness of the finished limestone powder?
The primary control for product fineness is the rotational speed of the classifier (separator). Increasing the classifier speed allows only finer particles to pass, resulting in a finer product. Decreasing the speed permits coarser particles to pass, making the product coarser. Adjustments should be made in small increments, allowing the system 15-30 minutes to stabilize after each change before evaluating the new product sample.


